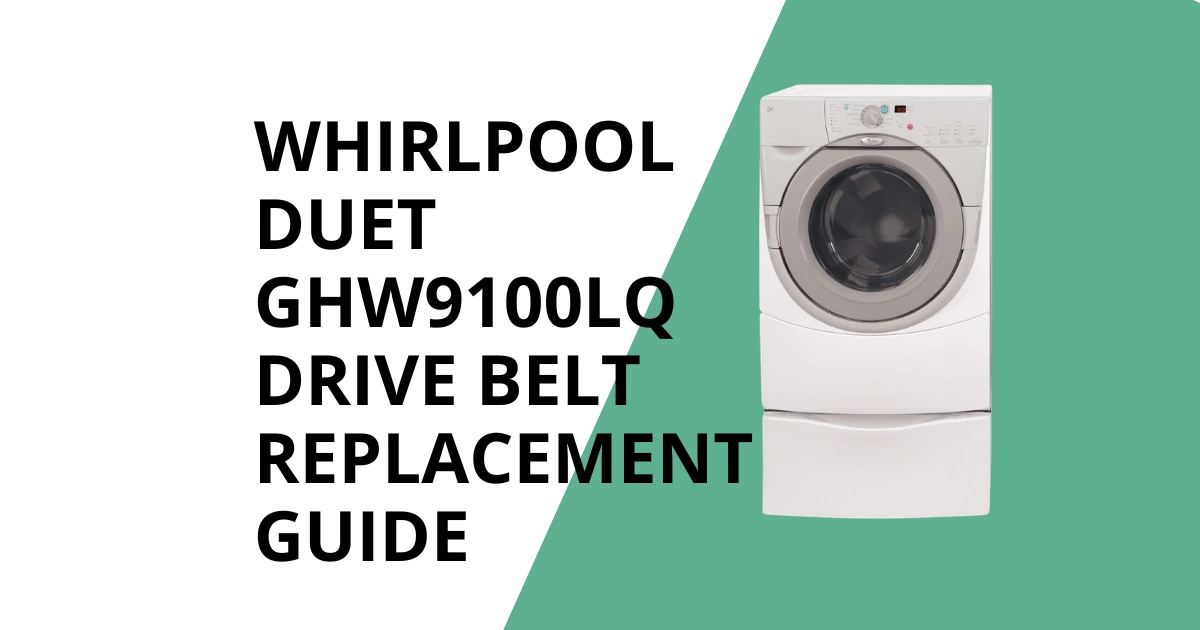
The drive belt on the Whirlpool GHW9100LQ is the mechanical link between the motor and the drum: a multi-groove Poly-V belt that transfers the motor’s rotational power to the large drum pulley, enabling every tumble, agitate, and spin motion the washer produces. It is an elastomeric consumable: over years of operation, it stretches, glazes, cracks, or breaks from the heat, tension, and flexion cycling that come with thousands of load cycles. When the belt fails, the motor runs and can be heard operating normally, but the drum does not move a symptom that distinguishes belt failure from motor or MCU failure and points directly to the drive belt as the repair target.
This guide covers the complete belt replacement procedure from rear panel removal through post-replacement confirmation testing, including the details of belt routing and tensioning that, if incorrect, cause premature re-failure.
DRIVE BELT SPECIFICATIONS AND PART NUMBERS
OEM part number: WP661570 (primary service replacement)
Cross-reference numbers: 661570, AP3083413, PS334998
Belt type: 6-groove Poly-V (also called J6 or Poly-V J-section, 6 ribs)
Belt application: Motor output pulley to drum/tub pulley, single belt
Belt length: approximately 1650mm (varies slightly between production batches; use OEM or confirmed-compatible aftermarket)
The 6-groove Poly-V profile is specific and must be matched exactly. Installing a belt with fewer or more grooves, or a different groove pitch, will slip immediately or within a few cycles because the groove engagement with both pulleys is designed for the J6 profile.
DIAGNOSING BELT FAILURE: CONFIRMING THE BELT BEFORE DISASSEMBLY
The symptom set for a failed drive belt is distinctive:
- Motor runs (clearly audible during cycle operation)
- Drum does not rotate in any direction
- No F-code fault related to motor or MCU (because the motor is functioning correctly)
- Possible slight burning or rubber odor immediately after the belt breaks (from the brief period when the belt slipped before breaking)
To confirm before full disassembly: access the rear panel and visually inspect the belt. A broken belt will be visible as a loop of rubber lying in the base of the machine or wrapped around the motor pulley. A slipping or worn belt (not fully broken) may be visible as a glazed or cracked appearance on the belt surface.
Belt failure should be distinguished from MCU failure (motor does not run at all) and from a mechanical drum lock (motor strains and may generate an MCU over-current fault). The differential diagnosis for all spin failures, including how to identify which component is responsible, is covered in the companion guide Why Your Whirlpool Duet GHW9100LQ Won’t Spin (MCU vs. Drive Belt Check).
TOOLS REQUIRED
- Phillips-head screwdriver (PH2)
- Flat-head screwdriver (medium and small)
- Nut driver (1/4-inch and 5/16-inch hex)
- Needle-nose pliers
- Putty knife or plastic pry tool (for panel clips if present)
- Work gloves (belt edges can be abrasive)
STEP 1: PREPARE THE MACHINE
Unplug the washer from the wall outlet. If the machine contains water (from a cycle interrupted by belt failure), drain it completely before proceeding. A drum full of water is extremely heavy and makes drum movement during belt installation very difficult. Pull the machine away from the wall to provide rear access; a minimum of 2 feet of clearance behind the machine is needed.
STEP 2: REMOVE THE REAR ACCESS PANEL
The rear panel on the GHW9100LQ is secured by screws around its perimeter, typically 8-12 Phillips-head screws. Remove all screws and set them aside in a container. The panel lifts straight off after all screws are removed. Set the panel safely away from the work area.
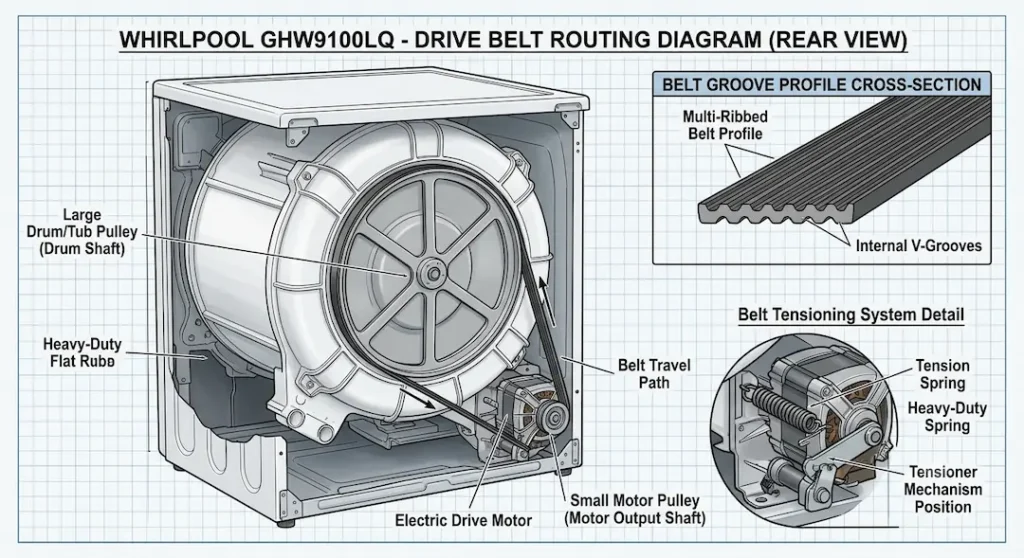
With the rear panel removed, the drive system is fully accessible. The large drum pulley is visible at the rear of the outer tub, the smaller motor pulley is at the base, and the motor is mounted on the bottom frame to the left or right of center.
STEP 3: REMOVE THE OLD BELT
If the belt has broken, remove the broken pieces from the machine. Check around the motor, at the base of the machine, and behind the drum pulley. Even a small piece of belt left in the machine can cause noise or wrap around the motor shaft.
If the belt is intact (stretched, slipping, or glazing) but not broken, the belt is under tension on both pulleys. To remove it, reach in and manually roll the belt off the motor pulley while rotating the drum pulley slightly. The motor pulley is the smaller of the two; rolling the belt off the small pulley edge is easier than attempting to roll it off the large drum pulley.
STEP 4: INSPECT THE PULLEYS AND MOTOR MOUNTING
Before installing the new belt, inspect both pulleys:
Motor pulley: Check for belt residue (glazed rubber deposits in the grooves), physical damage, or wobble. A wobbling motor pulley indicates a failing motor bearing, which is relevant because a bearing failure can destroy a new belt quickly.
Drum pulley: Check for the same issues, plus verify the pulley is firmly secured to the drum shaft (should not be able to rotate independently of the shaft).
Check the motor mounting: the motor on the GHW9100LQ may be mounted on a pivoting bracket that provides belt tension through spring tension or through the motor’s weight. Confirm this mounting is secure and the pivot moves freely if the motor uses a spring-tensioned mounting system.
STEP 5: INSTALL THE NEW BELT – ROUTING AND SEATING
Belt routing on the GHW9100LQ follows a figure-eight or straight path depending on motor position. Confirm the correct routing against the machine’s specific configuration before installing.
Standard routing (straight, single-plane):
1. Loop the belt around the large drum pulley first. The belt should engage all 6 grooves of the drum pulley completely; no groove should have the belt partially seated.
2. While maintaining the belt on the drum pulley with one hand, use the other hand to guide the belt onto the smaller motor pulley. Roll the belt onto the motor pulley by rotating the drum pulley slowly; this walking motion seats the belt into the grooves progressively around the pulley circumference.
3. Do not stretch the belt over a pulley edge by force; the correct belt for the correct application should seat under the normal tension the motor mounting provides.
Belt seating confirmation:
With the belt installed on both pulleys, rotate the drum pulley by hand through at least two full drum revolutions. The belt should run true on both pulleys without tracking toward one edge. Belt tracking toward one pulley edge indicates either incorrect belt routing or a misaligned pulley.
STEP 6: CHECK BELT TENSION
Correct belt tension is critical for service life. A belt that is too loose will slip during high-speed spin, generating belt squeal and causing glazing. A belt that is too tight increases load on motor and drum shaft bearings.
If the motor uses a spring-tension mounting: confirm the spring is correctly attached to the motor bracket and that the motor pivots away from the drum pulley under spring tension. The spring force provides the correct belt tension automatically.
If the motor uses a fixed-position mounting: the belt tension is a function of belt length and pulley center-to-center distance; a correct OEM belt length provides correct tension by design.
Correct tension feel: the belt should deflect approximately 1/2 to 3/4 inch under moderate finger pressure applied at the midpoint of the longest free span. More deflection than this = too loose. Less deflection = too tight.
STEP 7: REASSEMBLE AND TEST
Reinstall the rear panel, securing all screws. Plug in the machine. Run a short Spin Only cycle:
- Drum should begin rotating within a few seconds of cycle start
- No belt squeal, slapping, or unusual sounds
- Machine completes the spin cycle and reaches full spin speed (1000 RPM produces significant airflow through the machine audible as increased fan/air noise)
BELT LONGEVITY: FACTORS THAT SHORTEN SERVICE LIFE
Several preventable factors cause premature belt failure:
Overloading
Exceeding the GHW9100LQ’s rated load capacity increases belt load during spin ramp-up, accelerating stretching. The machine’s capacity in context is covered in the companion guide Whirlpool GHW9100LQ Washer Overview: Features, Capacity, Dimensions & Specifications.
Drum bearing wear
A worn drum bearing (rough or seized) dramatically increases the torque the belt must transmit, causing rapid belt fatigue. If a new belt fails within weeks of installation, worn drum bearings are a primary suspect. Bearing replacement is covered in the companion guide How to Replace the Inner Drum Bearings and Rear Tub Seal on Whirlpool GHW9100LQ.
Heat
Extended hot wash cycles heat the belt housing, softening the elastomer and reducing its fatigue resistance. Using cool or warm wash temperatures when possible extends belt life.